Tuesday, 23 April 2013

How I maintain the good looks of my acrylic nails, extending the wear time + nail designs ideas.

I rarely post about my nails on here, but I always do on Instagram,
I love doing nails, in fact the first thing that dragged me into the beauty world was doing nails,
putting all the lovely designs on ones nail is awesome ! 

I enjoy having acrylic nails, they make my nails hard and wont chip or break, and always stay
in a beautiful shape, and any shape I want. Plus I can paint over it when I get tired of it.

Every time I get my nails done, I tend to just get a glitter colored tip and I'm happy with it.
It is very plain and simple, doesn't over power,neat and presentable, not too long
that it will scare the girls who wants their make up done by me, haha.

This is how I like my nails done

And this is what it will look like in 2-3 weeks, nail has grown about  1/4 ,
the gap was getting very visible. (you'll notice when your girlfriends start to talk talk talk lol)
No Bueno !

And that is when the acrylic refill kits come in handy ! This is one that I found in Big Ws
It was 20 dollars, has everything you will need to do your own acrylic nails. 
I use it for both refilling 
and for making my own acrylic nails (when I do feel very skilful lol)


SO, what I do is :
1. I re-shape them from a square shape to a rounder shape (normally not a fan of square nails,
but its alright to have it once in a while, round nails are more comfortable and looks more
natural to me.) And buffing the edges of the acrylic down( the top area, so the new acrylic can
connect easier and blend in more and look less harsh)

2. I clean the grown out nail area with rubbing alcohol to make sure there is nothing on there
so It won't cause the acrylic shed so easily, also buffing it slightly , unfortunately I don't have one of those buffing machines, but I am planning to get one soon. (Look out for nail tutorials ;D)

3. I take the nail brush from the kit, dip it into the acrylic liquid to saturate the brush(make sure you put the liquid in a separate container so you don't contaminate the bottle.) Wiping the
excess off on the side of my little jar, so the brush is just saturated enough to pick up the powder, *If the brush is dripping, its not right, wipe it!) 

4. Drag the brush tip across the acrylic powder, creating a ball at the tip of your brush. Only take the amount of powder you need to fill your nail space, if you take too much you can make a mess. So i recommend a little at a time. (I take half of  pea size amount)

5. Place the ball of powder on where you want to refill, and smooth it out, take your time,
don't rush, if its getting a bit too tacky, saturate your brush again and continue to work on your nail. Make sure to smooth it out.

6. After all that, repeat the steps to the nails that need to be done. And let it dry completely before you work on the next step. Buffing the nail.

7. After everything is dried, you can start buffing the refilled area out, levelling it with your nails
until it gets to the way you want it, and what is left is putting a top coat on and your done!
Or if you are tired of the design you have already, you can always paint over them with your own design you like :> Promise your nails won't get yellow too ;D 

And then you have pretty nails again ! 

What mine looked like after refilling and added Seche veit
 Top Coat(Fav top coat, dries like a gel top coat). 
Yes you may still see the line there, I didn't buff it enough for it to fade out super nicely,but I knew I was going to paint over them soon anyways.


My refiling lasted a week and a half and now its looking like this, as I don't have a professional nail buffer like I was mentioning earlier in my post, It won't last as long as the work the professional nail girls do. Duh.. If if you do have it, yours will definitely last a lot longer as the acrylic has something to really really stick on( a slightly buffed nail surface is still not enough for acrylic to stick on for a long period of time).
So yea, here you see is my refilling area starting to lift(the horrid time when you hair starts to get stuck in it.)But I like the way it is, so I can do them every once every week,
 refreshing everything, so nothing is too old.

So I would wipe the top coat off, also some of the refill that is shedding off and then repeat the whole process again then finish it off with painted nails :)

And this is what I'm wearing this week.
I've been lovin mint colors and crosses lately, so vala , they are on my nails :)
A little bit of everything, ombre, glitter, poka dots, I love doing my nails.


I hope you enjoyed reading my first every post about my nails,and found it helpful,
and maybe a few ideas for your nails, pretty them up ! :>
I will definitely be posting more about my nails, so stay tuned !

(Ps . I'm not a professional, I'm just a nail junkie ;D so the tips I'm sharing 
may not be a super perfect solution to your nails, but go for it! 
Try it out and see what works for you the best . )

Have fun !
xx

Thursday, 18 April 2013

BH Cosmetics Glitter Collection Loose Glitter Review : Night Vision, Gold, Pearl, Hot Magenta, Deep Red, Lime Green, Dusty Blue

BH Cosmetics has released their brand new Glitter Collection last month, 20 new shades
of loose glitter. Being a BH fan, I ordered seven of them straight away.


They came in a little box each, fresh bright colored little boxes with a plastic screen
on two sides so you can see what is what.


Deep Red, Night Vision, Dusty Blue, Lime Green, Gold, Hot magenta, Pearl


They were $5.95 each, BH cosmetics is having a promotion on them right now for 42% off
so get it now for $3.50 only before its too late. Its such a good value for a super versatile
product like this. You can use it on any part of your body, not just eyes,
but nails, lips, cheeks etc. Plus the shade range is very big, 20 shades of glitter you can choose
from, what more can you ask for?

On their website, BH Cosmetics recommend that you apply the glitters with a wet brush, so spray your brush with fix plus or dip it in any mixing medium, 
clear lip gloss, eye lash glue then pack it on, and you will get your beautiful pigmented sparkle
look.

If you wanna sparkle your nails, all you gotta do it, dip your nail into the glitter while the polish
is still wet, or srinkle it onto the areas you want to glitter to be on.


Deep Red
Dark red color with blue, purple and gold reflex 
This one would be awesome on the lips to spice up any red lip for a night out
or paaarty !


Lime green
Light lime almost neon color green with gold reflexes 
Love the 'neoness'  of this glitter, it would look so good on the inner
tear duct or bottom lash line as a little pop of glitter, very pretty.


Dusty Blue
Nice medium blue with blue, red, green and gold reflexes
Typical blue color glitter, great to spice up your eyeliner that day if your
feeling like 'I want a bit more on my eyes today'. 


Night Vision
Dark grey black color glitter with silver reflex
I love this color, a black glitter can be very pretty on anything,
on your lips for a dark look, or if you want your black eyeliner to sparkle a bit that day
but not too much of a color, this will work.


Pearl
A white glitter with light purple, teal and gold reflex
Very pretty snowy glitter, you can pack this on any look to glam it up.


Gold
Gold glitter having gold reflex, no other color in it. Plain old true gold.
I love to have a gold glitter handy, its a color that would go with any other color look.
I think this is the one I will be using the most out of the bunch.

Hot Magenta
A dark hot pink color with blue gold and purple
(I cannot find my picture :< I'll update this post again soon with a close up pic of it)


My favorite one ? : Gold & Hot Magenta


These are great basic colored glitters, very handy to have in your makeup collection, 
since they come in so many great shades,
very pigmented, sizes of it is perfect,it's also very versatile. And good value !

I would totally recommend you to go get some while its still on sale.
Awesome stuff. Love it.
Hope you found this post enjoyable 
seriously check these babes out if your into glitter,
have fun !
xx

Tuesday, 2 April 2013

Inglot Cosmetics : Duraline, magical liquid in a little bottle

Have a problem with your gel liners huh, dried out ?! 
well the magic warrior is here to save you all !


In my recent purchase from Inglot Cosmetics, I got some gel liners, and other couple things along with this little magic in a bottle,

So, the Duraline is a liquid that is suppose to transform any powder eyeshadows into
a liquid and intensify the colors of the shadow. But you can always use this to revive your gel liners to make them as good as new again.
$19AUD /9ml from their online store 


It is a very clean sleek cute little bottle that comes with a dropper, oh so fancy. Definitely a thumbs up for the dropper, everybody loves playing with droppers.  


So, to transform an eyeshadow or pigment into a liquid form, all you have to do, is mix them together, take a small amount of each and mix it on the back of your hand, or a plate.
and taaadaaa! Custom any eyeliner colors you want and rock it !


To revive your drying liners, drop a little bit on the surface of it, and mix that little area around,
and then your gel liner should be good as new! 


Transform colors into a cool lipstick, face paint color etc.

This is Inglot pigment #62 if you were wondering.

A very good mixing medium indeed. But do note that this will not smudge proof or water proof
your products, it only turns it into a liquid, and since its a liquid, duh, you have to give it time to try once its applied !Seriously, I've read some reviews with people complaining about that. -_-
What a misunderstanding.

Overall, this is a great thing to have in your make up storage, if your on a never ending hunt for liquid eyeliners, or want to kill your gel liners cause they are drying, this will be very helpful.

Hope you find this post helpful.
xx


Urban Decay Naked Palette 2 Swatches.

So I know this bad boy has been out ages now and probably
almost everyone has got one of these,
either the first one or the second one or the basics one, and has posted things about it, but hey, I'm still gonna talk about it, cause this is just so awesome.


I never really had a good look at these palettes when they first came out, 
that is when everybody was comparing it
to the first one, I was like mehh, I have so many neutral palettes I don't need this.
THEN I played with the samples at a store and fell in love with both palettes,
so I went ahead and got both of it, tsk tsk tsk, Juns :p


Like all other UD shadows they feel like butter when you swatch it, pigmented as always,
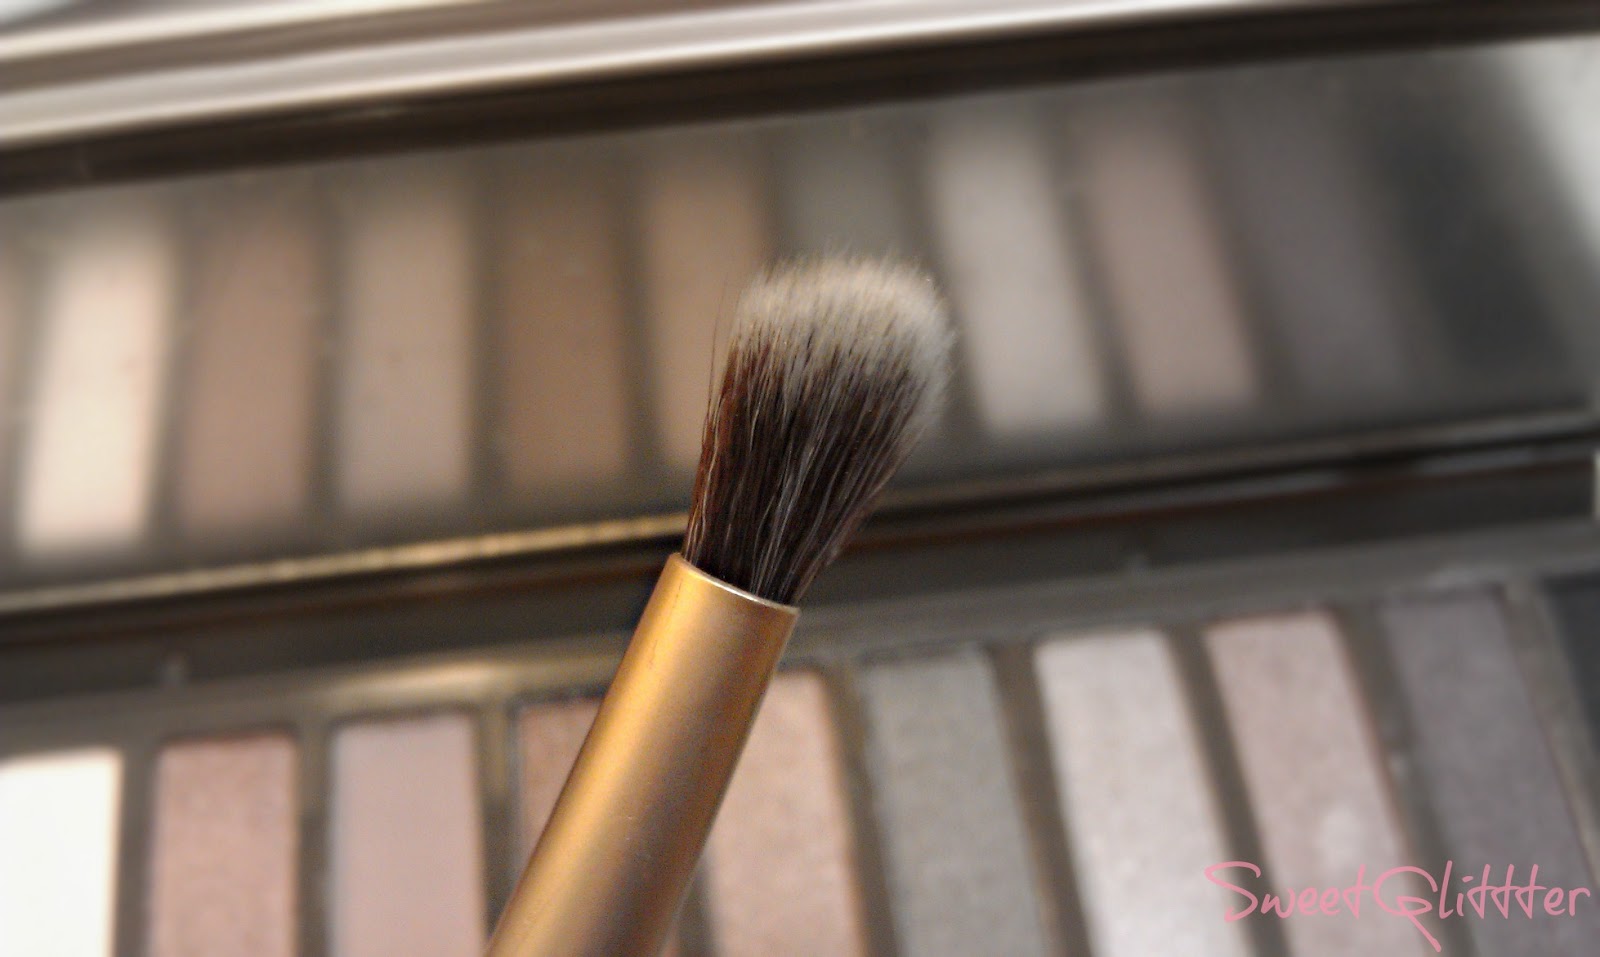
blends easy, has both warm and cool tones in the palette, and I really like that It came with a brush !

 Foxy, Half Baked, Bootycall, Chopper, Tease

Snakebite, Suspect, Pistol, Verve

YDK, Busted, Blackout

Although I heard a lot of people saying that blackout is like the blackest black they can find,
I don't really see it that way, my beloved NARS nightclubbing eye shadow still beats every black I own.


fluffy blending brush
Love this side of the rush, its so fluffy, perfect as a crease brush for me. I can use it to quickly
blend any crease color and make it look effortless.  

flat brush
I don't use this side much, as I use the heck out of the other, but its a good brush for packing on eye shadows  specially packing on wet shadows which is one of the best things you can do with flat brushes.

My favourite eye shadow in this palette : 
-Foxy : It's like I found my perfect matte lid color/brow bone highlight color
and surely I will hit pan on this one very quickly.

The only thing I actually don't really like is the packaging, I know, everyone says this one is more fancy and such, but I prefer the velvet box over this tin box,cause sometimes it feels like when it is a tin box, it can get a dint, or things can rattle inside.So personally, I think the naked 1 velvet box somehow has more protection if you drop it. 
But I gotta admit, I do love the big mirror.

xx

M.A.C Fluideline Brow Gelcreme : Dirty Blonde.

M.A.C came out with a new brow collection, the Stylish Brow Collection
that has these new awesome products, I've waited so long for this collection to come out,
if you have read my earlier post about the m.a.c's brow pencils, i have 
mentioned how excited I was getting about this collection there. 
So I went and got the brow gel, the mac girl said to me that these will be permanent, which I 
kinda doubt, according what everyone else is saying.
I only got the brow gel and left the pencils behind even though its like
I can hear screaming at me that I should bring them home, haha. 


There are three shades of the brow gel, DIRTY BLONDE, which is the one I got,
its a light taupe brown.
And the other two, REDHEAD and DEEP DARK BRUNETTE,
which is a golden brown and a dark brown,but I didn't get them
so If you wanna see swatches I suggest you go to this link here, where the awesome
Temptalia has the pictures of everything. ;)


I LOOVEE this product, it feels just like the normal fluidlines they have, so soft and fluffy,
glides on like a dream, and its really easy to blend out too.
They are supposed to be waterproof and smudge proof, long wearing and sets very quickly.
And that is great for me since I live in a very hot and humid place.


Here is how it looks like on my brows, even though it sets and goes no where, I still like to go over it with 
the m.a.c's boy girl brow set, gives me that extra lighter shade kick.


This is how my brows normally look like, I just fill them in, I would do a sharper, edgier look when
there is an occasion, and this brow gel is perfect for that too, cause its a gel its gives you very
fine control so you can do whatever you want with it, sharp lines, soft lines, fade it out easy etc.


Overall, love it, totally recommend you go get it before its all gone, cause this stuff is the BOMB!
Hope you enjoyed reading this post and found it helpful.
Have fun !
xx


Monday, 18 March 2013

Inglot Cosmetics : Gel liner #77 #82 # 87 #89 #95 swatches, photos & a little review

So recently I've made a purchase at Inglot Cosmetics,
I got a few of their gel liners, the famous awesome Duraline and a nail polish.
Ever since I got my first gel liner, I wanted the rest of them,cause they are so amazing.


Inglot Matte & NOBLE Collection Eyeliner Gels #77 #82 #89 #95

I ordered these through there online store for AUD$25 each(X__X), so pricey.
But good news for you girls in America cause It only sells for USD$12 each, ouch, never knew
why cosmetics in Australia is so much more expensive.


This is how it looks like when you get it
* MY TIP OF ADVISE : Don't throw away that little cover !!!
Keep it on there to air tight your jar with it. It can help your gel liner to not dry out so
quickly.


Inglot Matte Collection AMC Eyeliner Gel #77
A very solid matte black, it is definitely the BLACKEST BLACK gel liner you
will ever find, seriously, I compared it to m.a.c's blacktrack fluideline,
and yea.....blacktrack is not as dark as this one.  


These liners are so awesome, once they set, they do not go anywhere !
They are waterproof, smudge proof, great for people with oily lids, like me.
AND 
its fantastic for the waterline too ! Though everything you put on your waterline will fade or smudge away eventually, but these liners have a longer staying power than any other
gel liners I have used on my waterline. So, thumbs up for that !


Inglot Matte Collection AMC Eyeliner Gel #89
A medium taupe brown, I haven't used it yet, but it seems like its gonna be amazing
for brows too. And a great everyday liner if you don't like a harsh black color on your lids.


Inglot Matte Collection AMC Eyeliner Gel #82
Beautiful beautiful light blue toned purple

They are all very creamy and glides on very smoothly, and it sets pretty quickly too


Inglot NOBLE Collection AMC Eyeliner Gel #95
A true light gold color, kinda similar to the lush gold color liquid eye liner in Fantasy.

I'm one of those who is on a never ending hunt for gold liners, and I gotta say, I love this one,
I have never found a gold gel liner that is actually so pigmented ! Not like some other brands where their versions of gel liners are so watery it creases away so quickly like wind.
 And for those who don't like the mess of transforming a gold shadow into a liner, 
THIS IS FOR YOU !


I wore #82 the other day to see how it wears on me and this is what it looks like

10 hours later...


As you can see, 10 hours later, I get all oily all around my eye area, and my shadows are
slightly creased, there are dried out mascara fall outs which is kinda gross, under eye concealer is creased. But hey, my eye liner is still looking okay ! It did not transfer any where, once it set, it just stays there ! So, I'm happy with that.


The only down side is that.....


Inglot Matte Collection AMC Eyeliner Gel #87
Dark teel color(I've had this one for a while and it kinda dried out :/ ,
but it's still usable)

This product can dry out easily and quickly if you don't store it right, although I have heard so many reviews that raves about this product, this drying out thing tends to happen to everyone,
so if yours is already drying out, what you can do is use the gel liner with Duraline. 
OR
 If you have kept the little white plastic cover , yeay for that, you can keep it in there,so it can help not letting it dry out so quickly, at least that is what's working for my liners now. So, try that !
ANOTHER WAY
is to scoop some of the gel liner out and place it in another air tight jar, so you don't have to open and close your inglot jar so much. That will definitely help.

I would totally still get more of these gel liners, even though it has a little problem, but I can live with that, since these things are so amazing, I recommend it to all of you ! You will not regret
getting these products, once you do, you will fall in love in it, love, a dreadful bond muahahahaha !

Anyhew,
hope you liked my post and found it helpful
Have fun !
xx